Before starting off on our road trip from Canada to Argentina, I knew that given my propensity to get lost upon walking out my front door, that having accurate navigation would be critical. I looked at what we would need in terms of paper maps, mapping programs, GPS, etc. and decided we needed all of them.
We actually find that we use Google Maps a lot. It works great if we have a local sim card and are able to connect to Google’s server. However it is useless when there is no cell coverage or we are out of data on our prepaid plans. We do download maps in advance for Maps.Me, Forevermaps, etc., but having a dedicated Garmin GPS unit that is just a quick glance away has been very valuable.
Our Garmin Nuvi 2595 came with the maps of North American preloaded. But, once we crossed into Belize our digital avatar was lost in virtual space and needed new maps. This is where OpenStreetMaps came into the picture. Instead of buying the official maps from Garmin which costs a lot of money, I found I could load OpenStreetMaps into our Garmin GPS, and still have all the same functionalities as the official Garmin proprietary maps.
OpenStreetMaps is a crowdsourced, free to use, map of the world. Abbreviated as OSM, it powers thousands of web sites, mobile apps (like Maps.Me) and hardware devices under the the open license. In this blog post, I am going to show step by step instructions of how to load these free maps onto a Garmin GPS device using a Mac computer.
I – Software
If you don’t already have the Garmin MapInstall software, you are going to need it. It can be downloaded it here.
System Requirements:
Intel based Mac running OS 10.6 or higher.
1024 MB RAM (2048 MB recommended)
USB port
- Click on ‘Download’ and choose to save the file to your computer.
- Double-click the file to open it.
- A new Finder window will open. Locate and double-click on the ‘Install Garmin MapInstall’ icon.
- Follow the installer program’s prompts to install Garmin MapInstall.
II – Free Maps
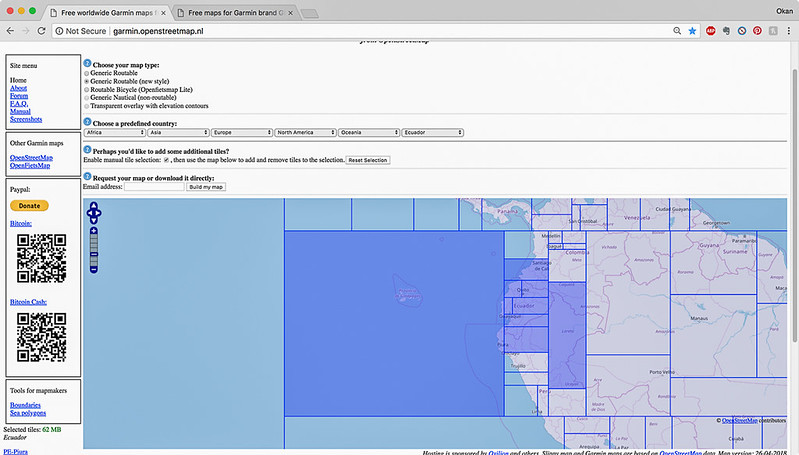
- Go to garmin.openstreetmap.nl

III – Map Selection
- Choose your map type – I am using Generic Routable (new style).
- Choose your predefined country under the appropriate continent pull down menu – in this example I am choosing Ecuador. Once you select the country, corresponding tiles will be highlighted.
- If you’d rather select more than one country or would like to add or delete some tiles, enable manual tile selection and click on the tile/s.
- If you have not selected additional tiles to add or delete, you can download the maps directly by clicking on Download Map Now and go to step V. If you decided to add or delete tiles then enter your email address and click on Build my map.

IV – Requests in Queue
Once your request is received, it will be put in a queue. If the server is busy it takes a while to process the maps. In this example, the Ecuador map took only seconds.
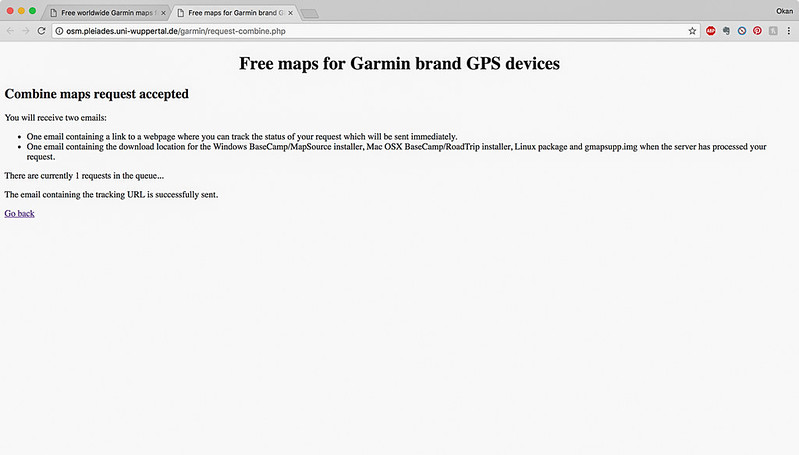
You will receive two emails, one with a link to track the process, and the other once the process is done which contains the download link.


V – Platform of your choice
When you click on the link in the second email, you will be directed to a webpage with 4 choices.
- Windows
- Linux
- Mac OSX
- img file for SD-card
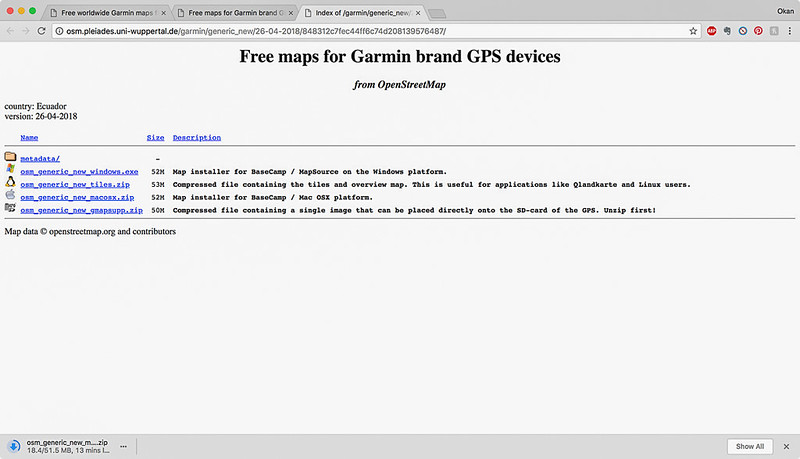
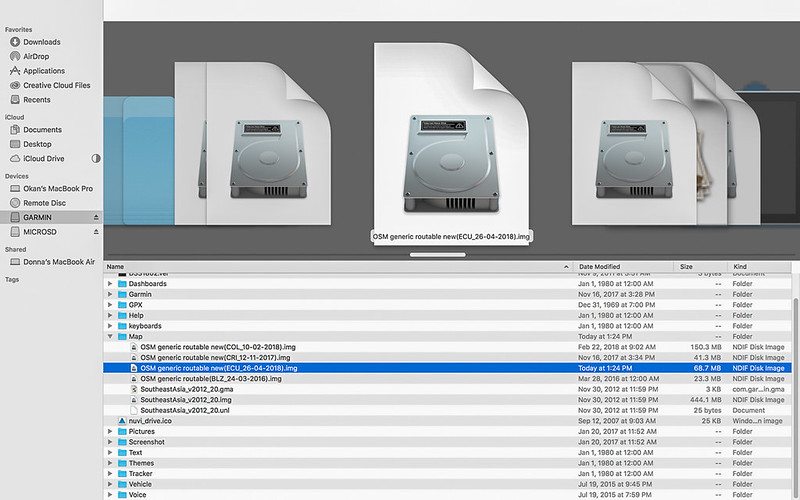
If you have a empty MicroSD-card, 4th choice is the one you want. Make sure to use the correct size MicroSD-card for your unit. My Garmin 2595 can read up to 8 GB MicroSD-cards. Some older models can only read 2GB MicroSD-cards. Click on osm_generic_smapsupp.zip. When the download is done, unzip the file. In your MicroSD-card create a folder called Garmin and copy the gmapsupp.img to that folder and voilà! You are done. Put the MicroSD-card in to your Garmin and enjoy your new map.
If you do not have a MicroSD-card and you have still space in your Garmin GPS unit, click on platform of your choice. In this example I am going to download the map for Mac OSX version.
VI – Loading the maps to Garmin GPS

- When the download is done, click on the downloaded file to unzip it. It will be in your downloads folder. For this example I moved the unzipped gmap file to my desktop.
- Connect your Garmin GPS unit to your computer. It should show up on your desktop.
- Launch Garmin MapInstall software.
- Garmin Mapinstall should find the new gmap file and prompt you with the similar window.

Click on confirm and your new map will be uploaded to your Garmin GPS unit. You should be able to see your new map in your Garmin/Map folder.